
Before you spend a single dollar on your home, it pays to slow down and build a real plan. Homeowners who jump straight into demolition or start buying materials without a sequence often end up paying twice for the same job. Mapping out every upgrade in order of priority, cost, and disruption gives you a roadmap that protects your budget and your sanity. This article walks through the major systems and spaces worth planning for, so you can approach your renovation with confidence instead of guesswork.
Assess Your Home’s Structural and Mechanical Systems First
Before touching paint colors or cabinet finishes, take stock of the systems that keep your house running safely. Roofing, plumbing, electrical, and HVAC systems are the backbone of your home, and problems here can undermine even the most beautiful cosmetic upgrades. A methodical assessment tells you what must be fixed immediately versus what can wait a few years. Start with the roof, since a leak here can quickly damage insulation, drywall, and framing below it. Check for missing or curling shingles, sagging spots, and signs of water staining in the attic. Most asphalt roofs last 20-25 years, so if yours is approaching that age, factor a replacement into your budget before scheduling any interior work. Plumbing and electrical systems deserve equally close scrutiny, even though they’re largely hidden from view. Look for slow drains, corroded pipes, discolored water, or a water heater older than 10-12 years, all of which suggest bigger repairs are coming. On the electrical side, an older home with a fuse box, aluminum wiring, or outlets that lack grounding may need an upgrade before you add new appliances or lighting circuits that could overload the system. Finally, evaluate your HVAC system’s age, efficiency, and maintenance history. A furnace or air conditioner past 15 years old is a strong candidate for replacement, especially if you’re already opening up walls or ceilings for other renovations. Hiring a licensed inspector for a whole-home evaluation, typically $300-$500, is a small price to pay compared to discovering a hidden structural or mechanical issue mid-renovation.
Many homeowners skip this step because it feels less exciting than picking out finishes, but it’s the step that prevents costly surprises later. Before you fall in love with a kitchen backsplash or a new paint color, spend a weekend confirming that the bones of your house are sound. A cracked foundation or failing furnace can quickly eat a budget that was earmarked for cosmetic upgrades. Walk through your attic, basement, and crawl space with a flashlight and a notepad. Look for water stains, cracked framing, or signs of pest damage that could signal bigger issues underneath. Pay attention to musty smells, sagging joists, or daylight visible through the roof decking, since these are often early warnings of moisture intrusion or structural stress. While you’re at it, check the age and condition of major mechanical systems: the furnace or heat pump, water heater, electrical panel, and plumbing. Most furnaces last 15-20 years, water heaters 8-12 years, and electrical panels can become outdated or unsafe well before that if they haven’t been updated to handle modern loads. Note the manufacture dates on data plates so you can estimate how many years of life you have left before replacement becomes urgent. Finally, jot down anything that seems off, even if you’re not sure it’s serious. A running list of hairline cracks, slow drains, or flickering lights will help a contractor or inspector prioritize what actually needs attention versus what’s simply cosmetic.
- Check attic insulation levels and ventilation — aim for R-38 to R-60 in most climates, and confirm soffit and ridge vents aren’t blocked by insulation
- Inspect visible plumbing pipes for corrosion or leaks, especially at joints, under sinks, and near the water heater
- Test electrical outlets and breaker panel capacity, noting whether the panel is 100-amp or 200-amp and if it can support future upgrades like EV chargers
- Note any sagging rooflines or uneven floors, which can signal foundation settling or joist damage
- Look for cracks in foundation walls or gaps around window and door frames that suggest shifting
- Check water heater age and condition, since most units last 8-12 years before needing replacement
Schedule a Roof Inspection Before Planning Cosmetic Work
 Your roof is one of the most expensive components to replace, so it deserves an early spot in your planning timeline. A reputable roofing company can tell you whether your shingles have five years of life left or whether a full replacement is looming. Getting this information early prevents the frustrating scenario of finishing an interior remodel only to discover a leak has ruined your new drywall.
If you’re already leaning toward a roof replacement, this is also the time to compare materials and long-term value. Metal roofing contractors can walk you through options that last considerably longer than asphalt shingles, often with better fire resistance and energy efficiency. Weighing these choices before you commit to a budget helps you avoid mid-project changes that inflate costs.
- Ask for a written inspection report with photos
- Get quotes for both repair and full replacement
- Compare warranty terms across contractors
- Factor in local climate when choosing materials
Evaluate Your Heating and Cooling Equipment

Heating and cooling account for a large share of most household energy bills, making this system a smart place to invest planning time. An outdated furnace or air conditioner not only costs more to run but can also fail unexpectedly during extreme weather. Bringing in air conditioning contractors for an efficiency check helps you understand whether your current unit is worth repairing or replacing.
Beyond the equipment itself, consider the ductwork and thermostat setup, since these affect comfort just as much as the unit’s age. Scheduling routine HVAC service before a major renovation ensures your system can handle any changes to square footage or insulation. This is especially important if you’re planning an addition, since undersized equipment struggles to keep new rooms comfortable.
- Ask about SEER ratings when comparing new units
- Request a duct inspection for leaks or blockages
- Consider a smart thermostat for better zone control
- Budget for annual maintenance visits going forward
Test Your Water Quality and Plumbing Infrastructure

Water quality is easy to overlook until a problem shows up as stained fixtures, odd tastes, or skin irritation. A certified water filtration system installer can test your supply and recommend a setup suited to your household’s needs, whether that means a whole-house filter or a simpler under-sink unit. This step matters more in older homes or properties on well water, where mineral content and contaminants vary widely.
While you’re addressing water quality, it’s worth checking the condition of your main line service as well, since aging pipes can affect pressure and flow throughout the house. A camera inspection can reveal root intrusion or corrosion long before it becomes a visible emergency. Catching these issues early keeps your plumbing budget predictable instead of reactive.
- Test for hardness, chlorine, and sediment levels
- Ask about filter replacement schedules and costs
- Request a camera inspection of underground lines
- Note any recurring low-pressure complaints in the house
Plan Kitchen Upgrades Around Function, Not Just Style
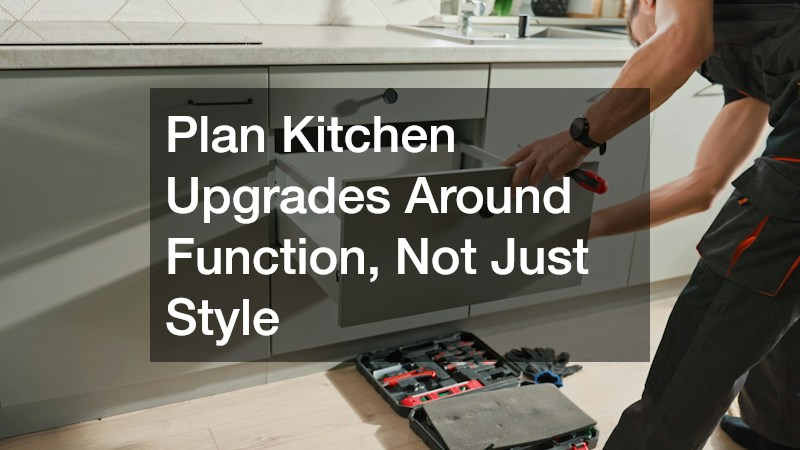
The kitchen is often the most requested renovation, and it’s also one of the easiest to overspend on if you don’t plan carefully. Start with layout and storage needs before falling in love with finishes, since a beautiful kitchen that doesn’t work for your cooking habits will frustrate you daily. Measuring your space and mapping the work triangle between stove, sink, and refrigerator helps guide every other decision.
Once layout is settled, kitchen cabinets typically consume the largest portion of a kitchen remodel budget, so it’s worth comparing stock, semi-custom, and custom options early. Stock cabinets save money but offer fewer size variations, while custom cabinetry costs more but fits irregular spaces perfectly. Deciding on this before ordering countertops or appliances prevents mismatched timelines and expensive change orders.
- Measure existing layout before shopping for cabinets
- Compare stock, semi-custom, and custom pricing
- Prioritize storage solutions like pull-out shelves
- Choose finishes that hold up to daily wear
Organize Garage and Storage Needs Before Renovation Begins
Storage is one of the most underestimated parts of a home upgrade plan, yet it affects how every other space functions. If your garage is packed with overflow from the house, tackling it early can free up room to stage materials during other renovations. Installing garage storage systems before a bigger remodel gives you a place to keep tools, seasonal items, and supplies organized and out of the way.
Thinking about storage holistically also helps you avoid clutter creeping back into newly finished spaces. Wall-mounted shelving, overhead racks, and labeled bins make it easier to find what you need without digging through boxes. This kind of organization pays off long after the renovation dust settles, since it keeps your home functional day to day.
- Sort items into keep, donate, and discard piles first
- Choose adjustable shelving for changing storage needs
- Use vertical space with overhead racks
- Label bins for quick identification
Refresh Your Landscaping and Outdoor Living Spaces
Outdoor spaces deserve a spot in your planning timeline too, especially since curb appeal affects both daily enjoyment and resale value. Start by assessing drainage, since standing water near the foundation can cause problems that undermine indoor renovations. Simple grading fixes or a French drain installation are often more urgent than decorative landscaping.
Once drainage is handled, ground cover and mulch choices can make a noticeable difference in how tidy your yard looks year-round. Many homeowners choose bark dust for garden beds because it suppresses weeds, retains moisture, and gives a clean, finished appearance at a reasonable cost. Planning these outdoor touches alongside indoor work helps you coordinate contractor schedules and avoid tracking debris through a freshly renovated home.
- Check grading slopes away from the foundation
- Compare mulch types for durability and cost
- Group plants by water needs to simplify irrigation
- Schedule outdoor work around weather patterns
Consider Whether Building New Makes More Sense Than Renovating
Sometimes the honest answer to a growing wish list is that renovation isn’t the most cost-effective path forward. If your home needs extensive structural work alongside every cosmetic upgrade, it’s worth running the numbers on new home construction as a comparison point. In some cases, building fresh allows for better energy efficiency and a layout that fits your family without the compromises of an older footprint.
This comparison isn’t right for everyone, but it’s a useful exercise even if you ultimately choose to renovate. Understanding rough costs per square foot for new construction in your area gives you a benchmark against your renovation estimates. It also helps you recognize when you’re approaching the point of diminishing returns on an aging property.
- Get a rough cost-per-square-foot estimate for new builds
- Compare timelines for permitting and construction
- Factor in the cost of temporary housing during either option
- Weigh long-term energy savings of new construction
Create a Realistic Timeline and Budget Buffer
Once you’ve assessed every system and space, the final step is sequencing the work and building in a financial cushion. Most experienced renovators recommend adding fifteen to twenty percent on top of your estimated budget to cover surprises, since older homes especially tend to reveal hidden issues once walls are opened. A realistic timeline also accounts for permit approval times, material lead times, and contractor availability.
Sequencing matters just as much as budgeting, since doing things out of order can mean redoing finished work. Structural and mechanical repairs should always come before cosmetic upgrades, and outdoor drainage work should happen before landscaping. Writing out this order on paper, even in a simple spreadsheet, keeps everyone involved in the project aligned.
- Add a contingency fund of fifteen to twenty percent
- List projects in order of urgency and dependency
- Confirm contractor availability before finalizing dates
- Build in buffer weeks for material delivery delays
Mapping out every home upgrade before spending a dollar takes patience, but it saves far more time and money than it costs. Start with the systems that protect your home’s safety and value, then work outward toward comfort, storage, and aesthetics. With a clear plan in hand, you’ll be ready to approach contractors, compare quotes, and make decisions with confidence instead of stress.